Synchronise Your Offline Notes Across All Devices Without the Cloud
TagSpaces with Syncthing is the combination you have been looking for
While no-cloud, offline note taking solutions like everyone’s favourite TagSpaces are still the privacy-conscious user’s best choice; cloud based apps, like the ever-popular Evernote, or the newer contestant Notion have the very distinct advantage of your notes always being available. Well, as long as you have Internet. Or pay for offline sync.
Of course, file-based notes are quite easy to sync with cloud services like Dropbox, or Google Drive, but that in itself defeats using non-vendor-locking cloudless software, since are turning back to the cloud, and giving up your data just to have it available across your device. (TagSpaces Pro can be connected to cloud-based object storages like AWS S3 or Wasabi, but that option is really more geared towards professional users, as the “Pro” badge in the name implies. Also, I know it’s still cloud, but with services like those, at least you are more in control.)
Personal file clouds such Owncloud/Nextcloud can be daunting to set up and might have additional hardware requirements, like for example a NAS, and while using the BitTorrent protocol appears to be a good idea in theory, Resilio Sync (formerly BTSync) can be buggy in real-life scenarios, plus the software is still proprietary, a
Syncthing to the rescue
I have been using Syncthing, for a good while now to access my TagSpaces notes on all my devices, and I have recently written about this (again). When a commenter (the commenter at the time of writing for that is the sole comment right now) asked about the viability of Syncthing to be used to sync TagSpaces notes, I had the bright idea to write about it.
If you have not heard of Synthing yet, you have been missing out. It is a free and open source, peer-to-peer file synchronisation solution available for a ton of platforms (Windows, Linux, Mac, Android, and lately even iOS, plus the less obvious ones, like BSDs and some NAS setups).
Syncthing is very configurable, easy to use (after some initial setup) fast, and painless, making it an ideal addition to your cloudless setup.
Installing the thing of sync
There are many ways you can install the application, and it will mostly depend on your platform. Syncthing’s community contributions page details all the ways you can get the thing, depending on your OS. On Android, you can get official and unofficial clients from the Play Store, on iOS, you can check out the unofficial Möbius Sync client or you can try the official beta via TestFlight (see their forum post for details). On Desk/Lap based devices, you get good video instructions for installing the official package for Debian based Linux distros and for Windows as well. It might be a bit of work (nothing excessive), but it’s well worth the effort.
The official way to use the thing is though an unobtrusive background process and a web-based User Interface. The latter simply means that you will access the Settings from a browser by navigating to http://127.0.0.1:8384/, which is basically accessing your local machine (for Windows/Mac users: 127.0.0.1 means ”localhost”), so no internet connection is involved or even necessary. Bookmarking it in the browser is the easiest way to access it later.
There are also GUIs and tray indicators available, but I personally do not really use or need these. (The GTK GUI will basically show the same stuff the browser already does, but in a separate window, while the tray indicator feature might prove useful to some.)
Syncing with the thing
So, navigating to the Web GUI address will present you with a default folder and no connections.

In the settings (Actions > Settings) you can change a number of things, the most important of which might be the GUI authentication username and password, which will be asked every time you start the web interface.
Syncing connected locations from TagSpaces
With Syncthing installed, stuff you access in TagSpaces no longer needs to be device-specific. I primarily use TagSpaces for note taking, so syncing notes is the main concern for me but, of course, all your files, bookmarks, tagged photos and meta-data from all of your connected locations can be synchronised similarly between all your devices. The thing needs a one-time setup (for each new device), and is automatic afterwards, making it quite painless.
One caveat here is that syncing being peer-to peer, you should always synchronise a device before you start modifying stuff, so you can avoid syncing conflicts (which are dealt with by renaming one of the conflicting files and keeping both), and that all the affected devices should be switched on and visible to each other on the network, but this is a small inconvenience when you consider the privacy advantages and the fine-grained control, as compared to any propriatery alternatives.
Another thing to mention is file changes. My TagSpaces Pro offers the option to watch folders for changes, so that real-time syncing can be reflected immediatlely. For note-taking, I find this really unnecessary, since I would usually take notes on one device at a time, then it would sync up with the others before I would even open anything anywhere else.
Adding Folders
While you can do this in any way you like, my approach is to add a main device, that being my desktop PC that’s usually on, which serves as the “central storage” for everything (taking the place of th cloud server), from which I sync to other devices (a laptop, a smartphone and a tablet) selectively. E.g. the phone only gets the notes, but not the drawings from the tablet, while the laptop also receives files I only use on the computers.
So, on the main device, you would connect all your TagSpaces locations, adding them as folders by clicking the “Add Folder” button on the GUI. In the popup window you can select the folder location, give it a name, (showing in the Syn GUI only).
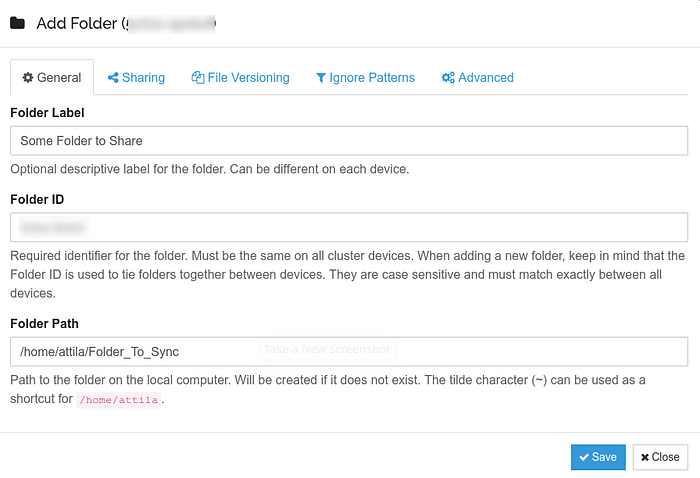
I also renamed my “Default Folder” to something more useful, and changed its location to my notes directory.
After you have connected some devices (more on that below), you can decide which ones you want to share the given folder with, by selecting the “Sharing” Tab.
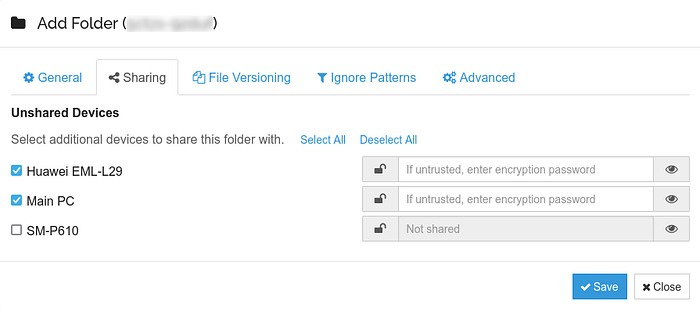
As soon as a connected device becomes available, it will receive a notification about the share, where you can accept or decline it. If you accept (and why wouldn’t you in this setup), you can decide where to save the Synced files and what you will call the shared folder.
And the folder is now being synchronised between the two devices automatically.
Adding devices
Of course, you need to add your devices as well. For mobile apps, this can be as simple as scanning the QR code of the main device (Actions > Show ID), and configuring the local folder.
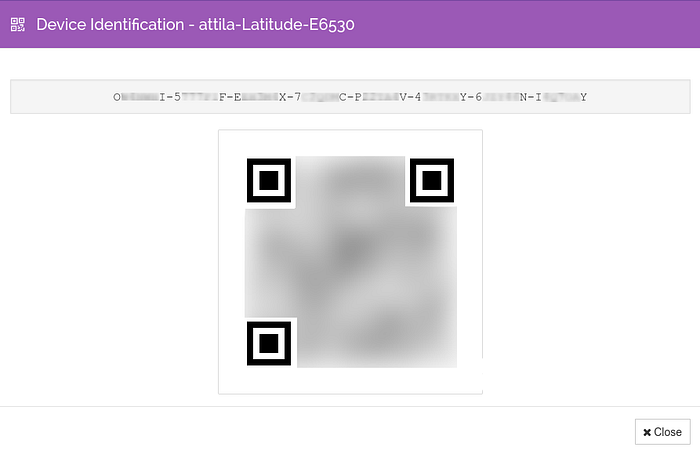
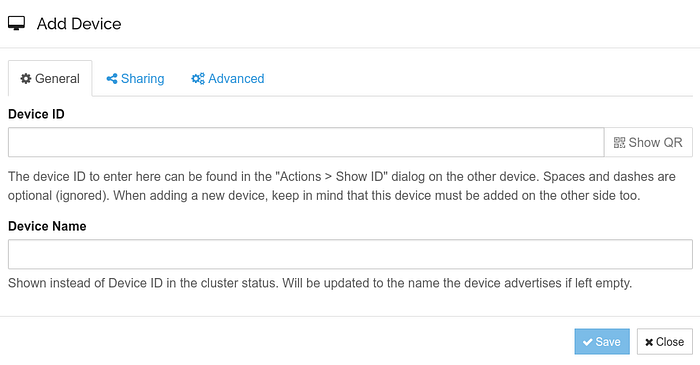
For devices with no camera, you can use the web intrerface and press “Add Remote Device”. There you should then paste the unique device ID from above ther QR code, and give your device a name as well.
If you already have some locations to hare (which you should, if you follow my advice), you can then select which locations you want to share. (For mobile devices, you should better do this from the main device), by selecting the device pressing “Edit” and going to the “Sharing” tab.
Important to note, when you are adding a folder to a device, you would usually have to accept it from the other device as well, unless, you select “Automatically accept” in the settings.
You can also consider marking the main device an “introducer” on the connected devices. This means that any devices with shared connections will be automatically added, saving you some setup trouble later on. If you are interested in how exactly introducers introduce their introducees, the Syncthing documentation is the way to go for some advanced reading)
Sit back and relax
So that’s mostly it, syncronisation would soon start, and while it might take a few minutes for very large folders, it is usually quite fast, especially for text based notes and smaller files.
Syncthing is powerful, there are a lot of options and settings to change and explore, but the documentation is exhaustive, and really helpful when you want to dig a little deeper into what is what. Coupled with TagSpaces it can soon make you forget you ever even wanted to try cloud based services while enjoying the complete control and unparalleled privacy this unique software combo offers.